The Deer
5 November 2020, 10:18 674
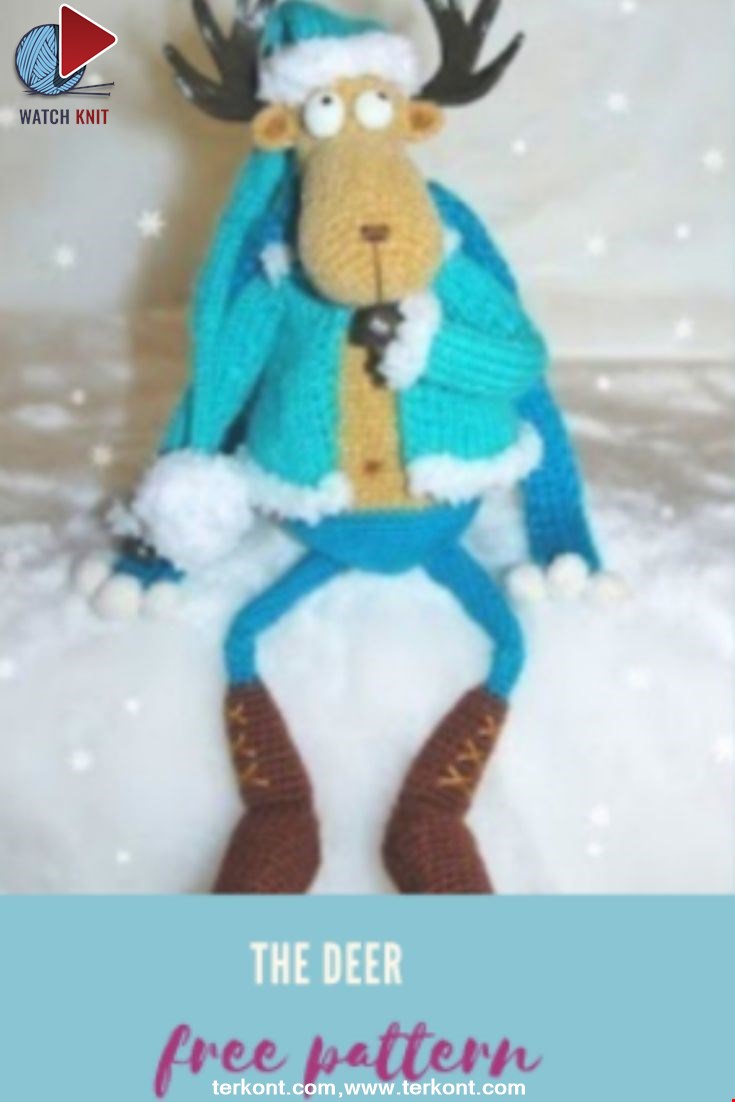
Description :
You will need:
yarn of four colors (for the body, 2 colors for clothes, one color for shoes) – all yarn should be the same thickness (slight deviations are possible, but not more than 50m per 100g) a hook that fits your yarn a little textured yarn for decoration (I have a Pouf) copper wire with a cross section of 1.5 mm polymer clay of two colors for hooves, horns and eyes varnish for coating parts from polymer clay threads for embroidery of the nose and mouth, laces on boots
linen hook for fastening on a jacket filler glue Super- Needle moment
Abbreviations
KA – Amigurumi VP ring- air loop
sbn – a single crochet column
psn – a half-column with a yarn of 3
psn in 1 – knit three half-columns with a double
crochet from double crochet Dv.ub – knit three loops together
Pr – increase
Ub – decrease
Body and head
We fill as we knit, moderately tight.
Body:
Start with the color of the pants.
1st row: 6sbn in spacecraft
2nd row: 6pr = 12
3rd row: (1sbn, Pr) * 6 = 18
4th row: 1sbn, (Pr, 2sbn) * 5, Pr, 1sbn = 24
5th row: (3sbn, Pr) * 6 = 30
6 row: 30sbn
7 row: 2sbn, (Pr, 4sbn) * 5, Pr, 2sbn = 36
8 row: (5sbn, Pr) * 6 = 42
9 row: 3sbn, (Pr, 6sbn) * 5 , Pr, 3sbn = 48
10th row: 48sbn
11th row: (7sbn, Pr) * 6 = 54
12th row: 4sbn, (Pr, 8sbn) * 5, Pr, 4sbn = 60
13-16 rows (4 rows): 60sbn
Change the thread to body color.
17 row: 60sbn for the back half-loop
18-22 rows (5 rows): 60sbn
23 row: 4sbn, (Ub, 8sbn) * 5, Ub, 4sbn = 54
24-27 rows (4 rows): 54bn
28 row: (7sbn , Ub) * 6 = 48
29-31 rows (3 rows): 48sbn
32 row: 3sbn, (Ub, 6sbn) * 5, Ub, 3sbn = 42
33-35 rows (3 rows): 42sbn
36 row: (5sbn , Ub) * 6 = 36
37-38 rows (2 rows): 36sbn
39 rows: 2sbn, (Ub, 4sbn) * 5, Ub, 2sbn = 30
40-43 rows (4 rows): 30sbn
We assemble the frame. We bring the wire for the legs between the 5th and 6th rows, for the hands in the 42th row.
44 row: (3SBN, UB) * 6 = 24
45-51 rows (6 rows): 24SBN
Fold the neck in half, so that the wire for the hands and nock is strictly on the sides. Mark the central 8 loops. After that, the marker must be moved to the end of these 8 loops. To do this, we either tie the missing loops or dissolve the extra ones.
Leave the thread for tying the head.
Head:
1st row: 6sbn in spacecraft
2nd row: 6pr = 12
3rd row: (1sbn, Pr) * 6 = 18
4th row: 1sbn, (Pr, 2sbn) * 5, Pr, 1sbn = 24
5th row: (3sbn, D) * 6 = 30
6 row: 30sbn
7 row: 2sbn, (D, 4sbn) * 5, Ds, 2sbn = 36
8-11 rows (4 rows): 36sbn
12 row: 2sbn, (Ub, 4sbn) * 5 , Ub, 2SBN = 30
13-16 rows (4 rows): 30SBN
17 row: (3SBN, UB) * 6 = 24
18-19 rows (2 rows): 24SBN
We tie the head to the body left by the thread on the body as follows: 8sbn (the body along the marked loops and the head from 1 to 8 loops). The hook is introduced from the wrong side of the body.
We continue to knit the head.
20th row: 1sbn (from the junction), 16sbn over the body, 1sbn (from the junction), 2sbn, (Ub, 1sbn) * 4, 2sbn = 30
21th row: Ub, 14sbn, Ub, 12sbn = 28
22nd row: Ub , 12sbn, Ub, 3sbn, Ub, 2sbn, Ub, 3sbn = 24
23-24 rows (2 rows): 24sbn
25 row: (2sbn, Pr) * 2, 3sbn, (Pr, 2sbn) * 2, 9 sbn = 28
26th row: 28sbn
27th row: 8sbn, Pr, 13sbn, Pr, 5sbn = 30
28-29 rows (2 rows): 30sbn
In the 28th row we draw the wire for the horns a little further than the axis of the arms and legs. Between the horns 10 loops.
30 row: (3SBN, UB) * 6 = 24
31 row: 1sbn, (Ub, 2sbn) * 5, Ub, 1sbn = 18
32 row: (Ub, 1sbn) * 6 = 12
33 row: 6ub = 6 Cut the
thread, tighten the hole, fasten the thread and hide it.
Legs
Knit a thread color pants.
1 row: Dial 11 loops around the wire, starting from the center.
2-7 rows (6 rows): 11SBN
8 row: UB, 9SBN = 10
9-10 rows (2 rows): 10SBN
11 row: UB, 8SBN = 9
12-13 rows (2 rows): 9SBN
14 row: Ub , 7SBN = 8
15 row: 8SBN
16 row: UB, 6SBN = 7
17 row: 7 SBN
18 row: UB, 5SBN = 6
19-20 rows (2 rows): 6SBN
We knit a knee (3psn in 1), if necessary, adjust its position. The knees are looking forward. 21, 22 and 23 rows are knitted according to your changes.
21 rows: 3sbn, 3psn in 1, 2sbn = 8
22nd row: 3sbn, 3psn, 2sbn = 8
23th row: 3sbn, Dv.ub, 2sbn = 6
24-26 rows (3 rows): 6sbn
Change the thread to brown (color your shoes), we transfer the marker
27 rows: 6pr = 12
28-29 rows (2 rows): 12SBN we adjust the beginning of the next row so that the increments in the 30 row are on the sides. To do this, we either knit additional displacement loops, or we do not knit 29 rows to the required number of loops. Move the marker to a new point. For the left leg, the beginning should be located on the outside of the leg, for the right – on the inside.
30 row: (5SBN, D) * 2 = 14
31-32 rows (2 rows): 14SBN
33 row: (6SBN, D) * 2 = 16
34-35 rows (2 rows): 16SBN
36 row: (7SBN, D) * 2 = 18
37-38 rows (2 row): 18SBN
39 row: 8SBN, 10VP, skip 10 loops, 1SBN we transfer the marker.
40 row: (Ub, 1SBN) * 6 = 12
41 row: 6 Ub = 6 Cut the thread, tighten the hole, fasten the thread and hide it.
Attach the thread in the middle of the heel.
1 row: 1sbn, Pr, 3sbn, Ub (in the corner), 8ss behind the front wall, Ub (in the corner), 3sbn, Pr, 1sbn = 22
2nd row: 2sbn, Pr, 3sbn, Ub, 6sbn for the front wall, Ub , 3sbn, D, 2sbn = 22
3-5 rows (3 rows): 22 sbn
6 row: 7sbn, Ub, 5 sbn, Ub, 6sbn = 20
7-8 rows (2 rows): 20sbn
9 row: 6sbn, Ub , 5SBN, UB, 5SBN = 18
10-11 rows (2 rows): 18SBN
12 row: (5SBN, UB) * 2, 4SBN = 16
13 row: 16SBN
14 row: 4SBN, UB, 5SBN, UB, 3SBN = 14
15 row: 14SBN
16 row: 4SBN , Ub, 5sbn, Ub, 1sbn = 12
17 row: 6 Ub = 6 Cut the thread, tighten the hole, fasten the thread and hide it.
Hands (2 pcs.)
Hands can be tied separately, then just sew to the body. In this case, we simply knit according to the description.
When knitting hands on the body, it is necessary to adjust the position of the elbow (must look strictly backward) as we did with the knees on the legs.
1st row: Dial around the wire 9 loops
2-9 rows (8 rows): 9sbn
10th row: Ub, 7sbn = 8
11-12th rows (2 rows): 8sbn
13th row: Ub, 6sbn = 7
14-15th rows (2 rows ): 7sbn
16 row: Ub, 5sbn = 6
17-18 rows (2 rows): 6sbn
Elbow: 19th row: 3psn in 1, 5sbn = 8
20th row: 3psn, 5sbn = 8
21th row: Dv.ub, 5sbn = 6
22- 32 rows (11 rows): 6sbn
Ears (2pcs)
1 row: 5vp, with 2 loops from the hook 2sbn, 1psn, 3psn in 1, 1psn, 2sbn
2nd row: 3sbn, 3pr, 3sbn
Connecting loop. Cut the thread, leave for sewing.
Jacket
Knitting is painted for my knit density and my threads. I advise you to measure the waist circumference of the moose, tie the sample with the front surface and calculate how many loops you will need. And then already knit according to the painted principle. Type 57 stitches
+ 2 hem = 59 on the knitting needles.
1-4 rows: we knit all the loops on the wrong (we get 4 rows of scarf knitting)
5-8 rows (4 rows): knit with front stitch;
9 row: chrome., 3 faces, decrease with a left slope, 7 faces, decrease with a left slope, 8 faces, decrease with a left slope, 9 faces, decrease with a right slope, 8 faces, decrease with tilt to the right, 7 faces, decrease with a tilt to the right, 3 faces, chrome. = 53
10 row: all wrong side
11 row: all wrong side
12 row: all wrong side
13 row: chrome., 3 faces, decrease with a slope to the left, 6 faces, decrease with a slope to the left, 7 faces, decrease with a slope to the left, 7 faces, decrease with a slope to the right, 7 persons, decrease with an inclination to the right, 6 persons, decrease with an inclination to the right, 3 persons, chrome. = 47
14th row: all wrong side
15th row: all facial
16th row: all wrong side
17 row: chrome., 3 faces, decrease with an inclination to the left, 5 persons, decrease with an inclination to the left, 6 persons, decrease with an inclination to the right, 6 persons, decrease with an inclination to the right, 5 persons, decrease with an inclination to the right, 3 persons, chrome. = 41
18 row: all wrong side
19 row: all wrong side
20 row: all wrong side
21 row: chrome., 3 faces, decrease with a slope to the left, 4 faces, decrease with a slope to the left, 5 faces, decrease with a slope to the left, 3 faces, decrease with a slope to the right , 5 persons, decrease with an inclination to the right, 4 persons, decrease with an inclination to the right, 3 persons, chrome. = 35
22 row: all purl
23 row: chrome., 6 faces, row not knitted, we knit the right shelf
24 row: 6 life (we do not remove the first loop as an edge, but we knit like all the loops of a row), chrome.
25 row: chrome., 3 faces, decrease with a slope to the left, knit the end loop front
26 row: 5 life (we do not remove the first loop as an edge, but we knit like all the loops of the row), chrome.
27 row: chrome., 5 faces. We break the thread, leave the loops on the spoke, but in the future they do not participate in the work. We turn to knitting the back.
23 row: we attach the thread and close 2 loops of the front, 16 faces, we unfold the knit
24 row: 17 lifes (we do not remove the first loop as an edge, but we knit like all the loops of the row)
25 row: we knit the first extreme loop with the front, decrease with a slope to the left, 3 persons, decrease with an inclination to the left, 1 persons, decrease with an inclination to the right, 3 persons, decrease with an inclination to the right, 1 persons
26 row: 13 life (we do not remove the first loop as an edge, but we knit like all the loops of a row)
27 row: 13 faces (the outer loop is tied to the front) We break the thread, leave the loops on the spoke, but in the future they do not participate in the work. We proceed to knitting the left shelf.
23 row: attach the thread and close 2 loops of the front, 5 faces, chrome. we expand knitting
24 row: chrome., 6 life
25 row: we knit the first extreme loop with the front one, decrease with an inclination to the right, 3 faces, chrome.
26 row: chrome., 5 life
27 row: 5 faces (we do not remove the first loop as an edge, but we knit like all the loops of a row), chrome.
28 row: we knit all the loops on the needle with the wrong ones, so we connect all parts of the sweater
29 row: chrome., 6 faces, decrease with a slope to the left, 2 faces, 3 loops together the middle loop should be on top, 2 faces, decrease with a slope to the right, 6 faces, chrome.
30 row: all wrong
31 row: close all the loops with the front
After closing the loops at the end there is one loop on the spoke. We remove the needle, take the hook and tie the edge of the shelf with single crochet columns. We break the thread. We tie the edge of the second shelf.
In the armhole for the sleeves, starting from the middle of the armpit, we collect 11 loops and knit in a circle. We knit 9 rows of facial loops. In the 10th row, at the beginning of the row, we decrease with a slope to the left. 11 row knit facial. At the end of row 12 we make a decrease with a slope to the right. 13 row we knit facial. In the 14th row, at the beginning of the row, we decrease with a slope to the left. Next, we knit all the rows of faces until we reach the desired length. We knit the last row with purl loops. Close the loop.
Next, we take the textured yarn (I have a pouf), we tie the neck with columns with a crochet. We tie the bottom of the sweatshirt and sleeves with single crochet columns on the tops of the purl stitches. You should get two rows of edge.
On the top of the jacket’s edge (just below the neck), we sew the clothes hook for the fastener on the inside. You can sew ribbons and tie on a bow.
Cap We
collect 27 loops, divide them into 3 stocking knitting needles, knit in a circle.
We knit the first 3 rows with a garter stitch (alternate out of row, faces. Row, out of row). Further, all rows are knitted with facial loops. We knit 9 rows of facial. Starting from the 10th row, we make the first decrease in each row (we do them in a chaotic order so that they do not catch the eye). We knit in this way until we have 9 stitches left. 5 rows of facial. (A row with one decrease, 3 rows of facial) – repeat 6 times. 15 rows of facial. Cut the thread, tighten the loop, leave the thread for sewing the pompom. We tie the edge of the cap in the same way as the bottom of the sweatshirt.
From the same textured yarn we knit a ball of the size you like, we stuff it. You can even tie a bead. Sew to the hat.
Scarf
We collect loops for the desired width. We knit with a rubber band 1 on 1 until we reach the desired length. Sew 3 pompoms on the ends of the scarf or attach brushes.
Hooves, horns, and eyes
From brown polymer clay we sculpt two truncated pyramids. The upper apex is slightly less than the thickness of the elk’s hands, the lower one is slightly larger. With the same wire (without braid) that was used in the frame, we make indentations on the hooves, as shown in the photo. We pierce from above the wire somewhere to the middle of the hoof. We take out the wire only after heat treatment or drying of the plastic !!!
We draw on paper a pattern of our future horns as you see them. Cut out. Now we take the plastic roll pancake 4-5mm thick. Damn it should be such a size that our template fits on it whole.
With a clerical knife, we cut our horn along the contour of the template.
Fingers smooth the edges. If you use self-hardening plastic, then the edges can be treated with sandpaper after complete drying.
To give a curved shape to the horn, I use a regular plastic ball. Gently hug the ball with the horn, do not press down, otherwise the plastic will stick to it. You can wrap the ball with cling film. We pierce the horn in the place of attachment to the head with a wire somewhere at 5mm. We put the ball with the horn in the refrigerator for 15-20 minutes, so that the plastic cools down and “remembers” the shape we need. Then carefully remove the horn from the ball.
Similarly, we make the second horn. We take out the wire only after heat treatment or drying of the plastic !!!
For eyes from white plastic, we roll two balls of different sizes, you can blind and two are the same. The pupil can then be painted with acrylic black paint, or you can push a black small bead.
Now we heat-treat our parts. Either bake or cook. When using self-hardening plastic, we are waiting for it to completely dry.
We cover everything with varnish.
Design:
Sew on the ears.
Embroider the nose and mouth. Play with a smile. It can be wide, narrow, or it can even be on the side. Feel the mood of your moose!
Tighten the navel 5-6 rows above the pants. We introduce the needle from the back side opposite the navel point, bring the needle to the navel point, retreat a couple of loops and return the needle to the starting point. We tighten the umbilical cord, tie a little knot, hide the threads. Please note: on the back the strings should go into the same hole so that there is no dent on the back and the little knot is hidden inside the body.
We bite off the excess wire with wire cutters (we leave the length equal to the depth of the holes in the hooves and horns) on the hands and on the head, remove the braid. Glue the hooves and horns in place.
Glue the eyes.
We tint the place of the navel, the inside of the ears. You can do tinting around the eyes. You can also embroider eyebrows.
We embroider the laces on the shoes.
Category Popular Posts
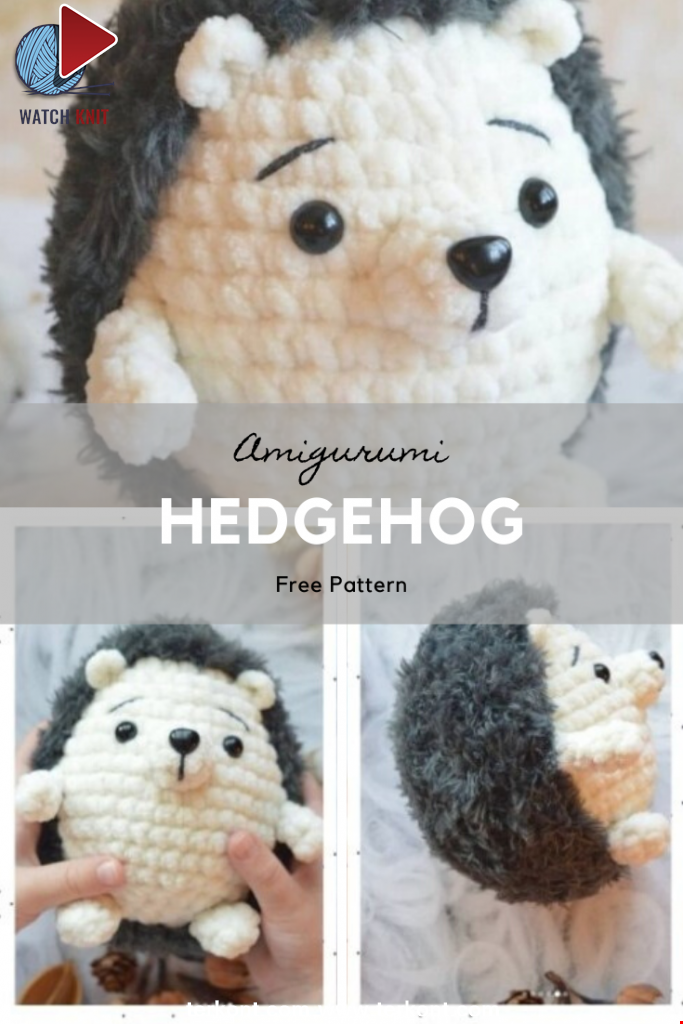
Amigurumi Hedgehog Free Pattern
12 October 2020, 09:52 20981
Making Amigurumi Spiderman
27 January 2022, 20:58 23073

Hello, Are you ready to knit Spiderman, Spider-Man, the children's favorite cartoon character? You will be able to knit easily with detailed explanation. Let's start!
Read More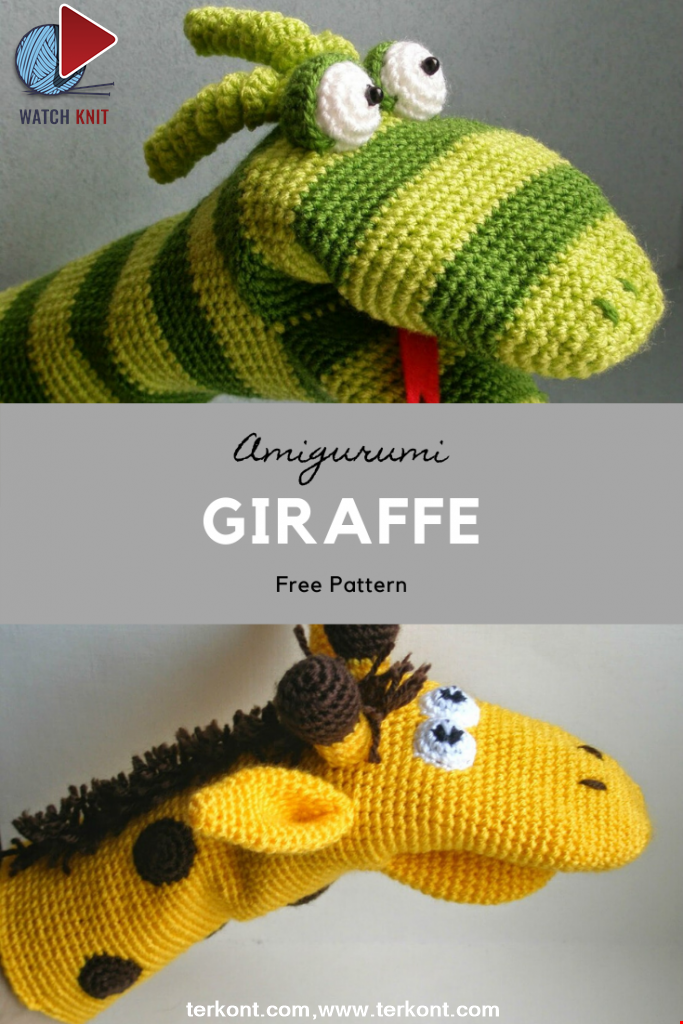
Amigurumi Princess Mononoke Crochet Pattern
12 December 2020, 21:20 12775
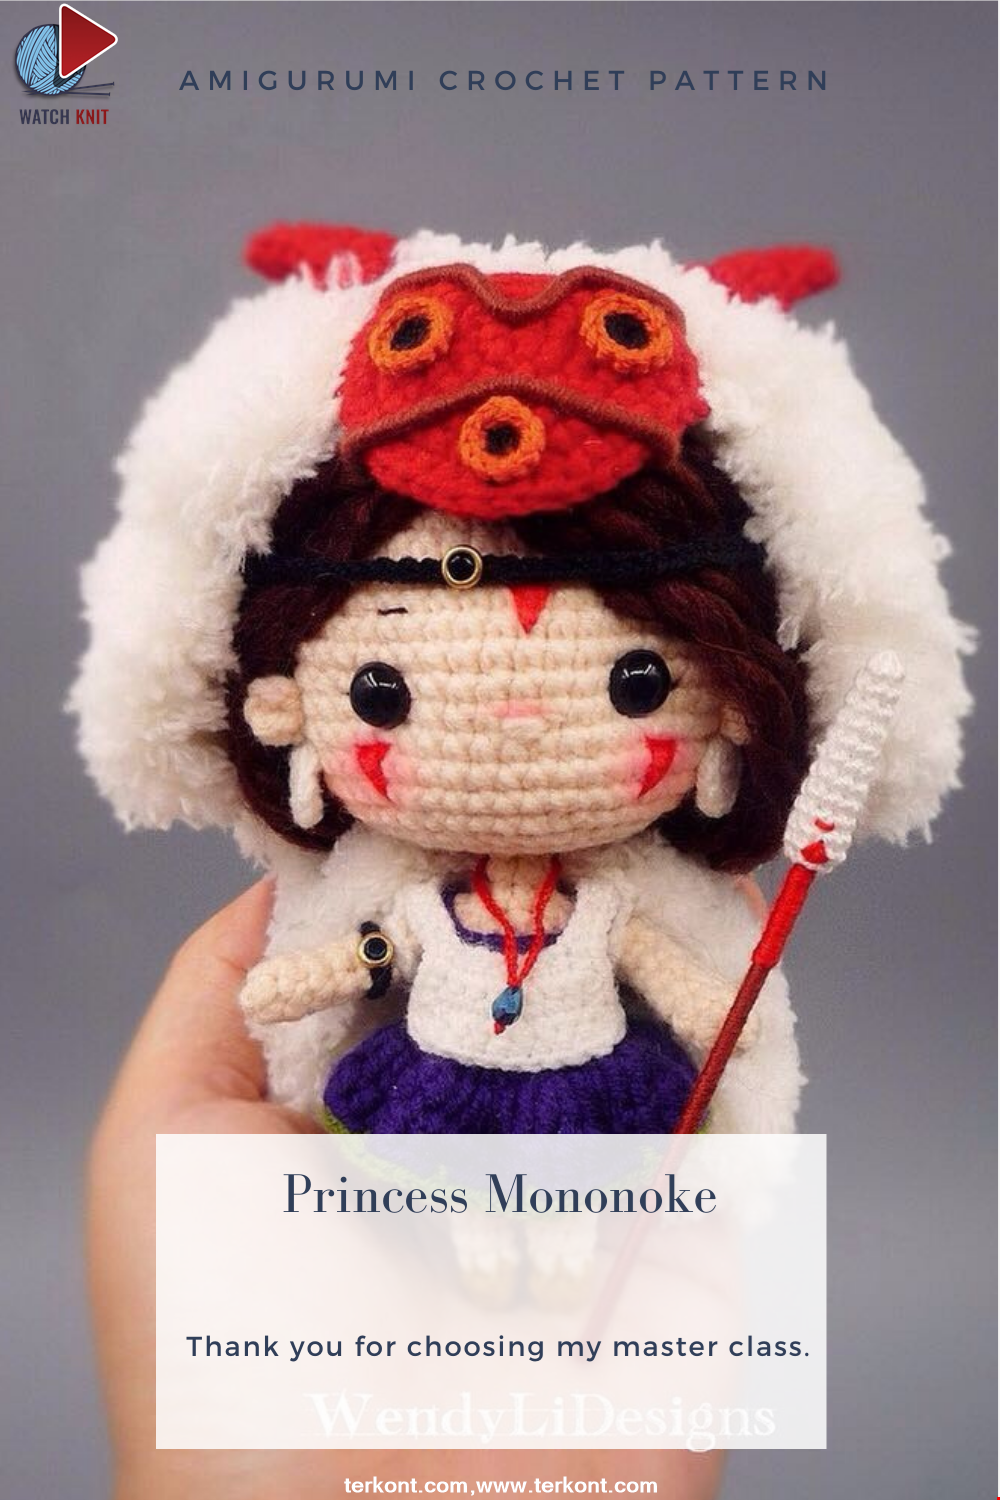
Free Crochet Princess Mononoke workshop by Wendy Li. The knitted girl is the hero of the cartoon by Hayao Miazaki. From the description of the diagram, you will also learn how to knit: a cape, a cloak, a dress and a mask for a doll.
Read More
Princess Disney Amigurumi Pattern
8 October 2020, 14:51 6225
Korean Girl in Traditional Dress (Hanbok)
22 September 2020, 11:11 4358
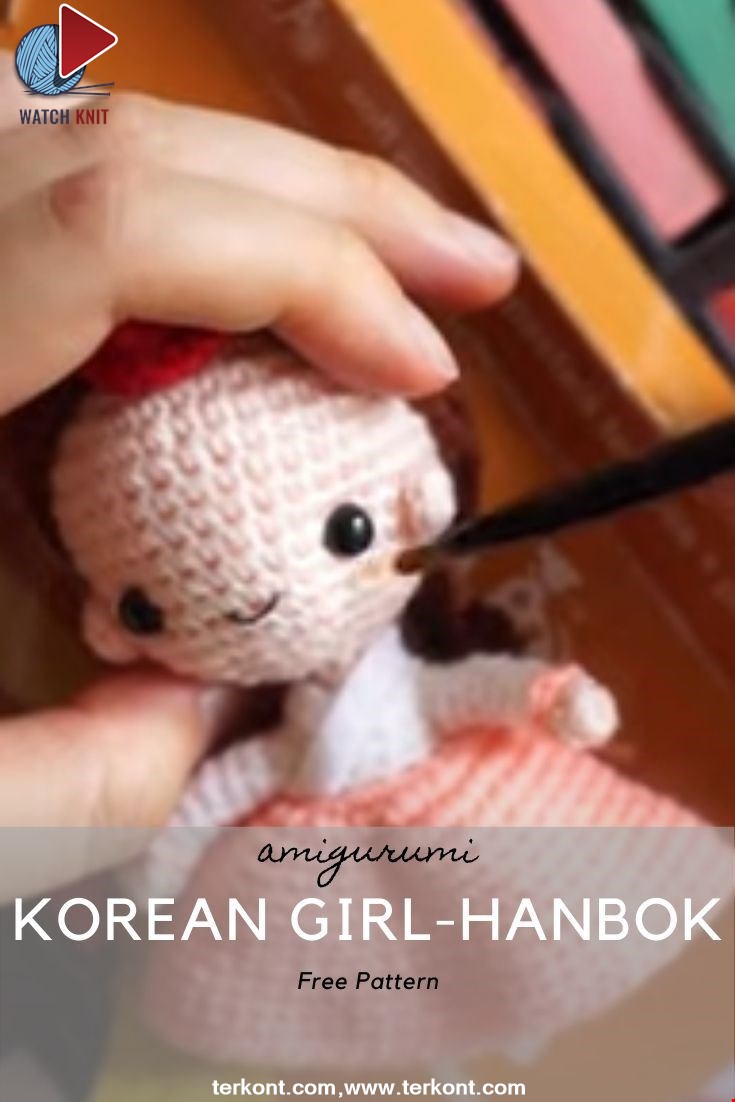
This is the process how I made the amigurumi of Korean Bride in traditional dress Hanbok. Lately I've been watching a lot of Korean dramas and got inspired to make one. I hope you can enjoy the video, and get inspired too!
Read More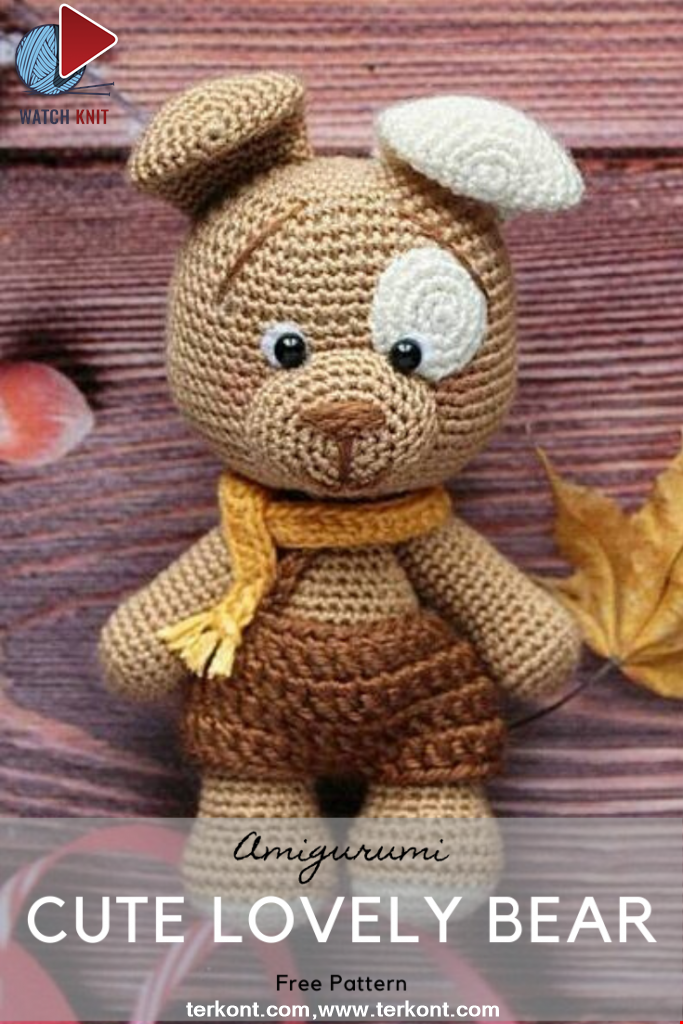
Amigurumi Sweet Giraffe Recipe and Preparation
5 January 2022, 14:55 3858
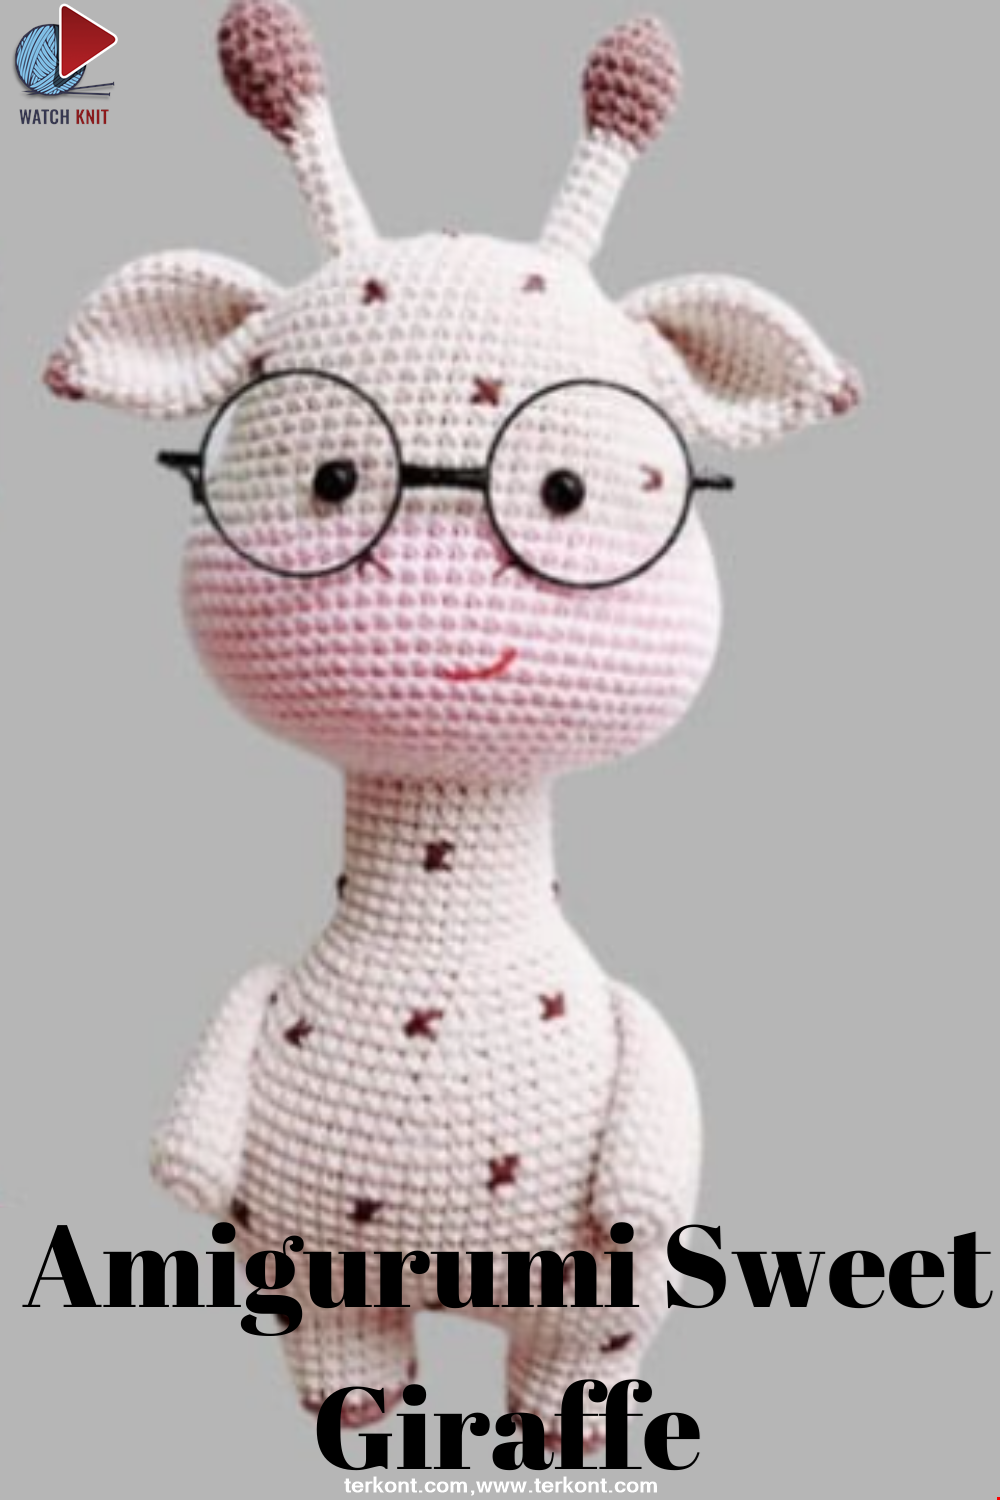
We have come to share with you the most popular model of recent times with the Amigurumi sweet giraffe recipe. I hope it will be an amigurumi animal figure that you like very much and knit with love.
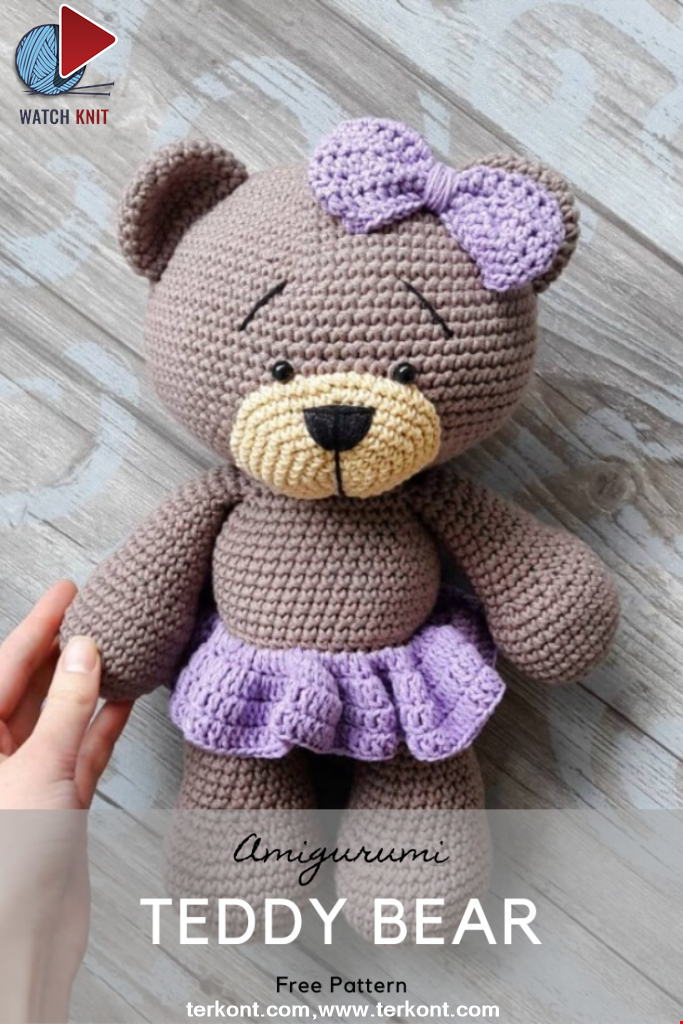
Read MoreLovely Teddy Bear Amigurumi Tutorial
12 October 2020, 10:05 1511